
Note: A task template is created to have automated tasks to do certain actions based on a lead status or sub-status.
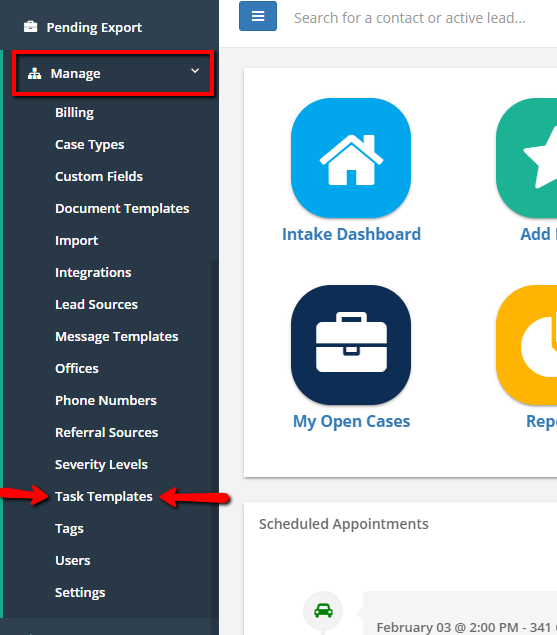
Step 1 - Click the Task Templates button under the Manage tab in the left navigation menu.
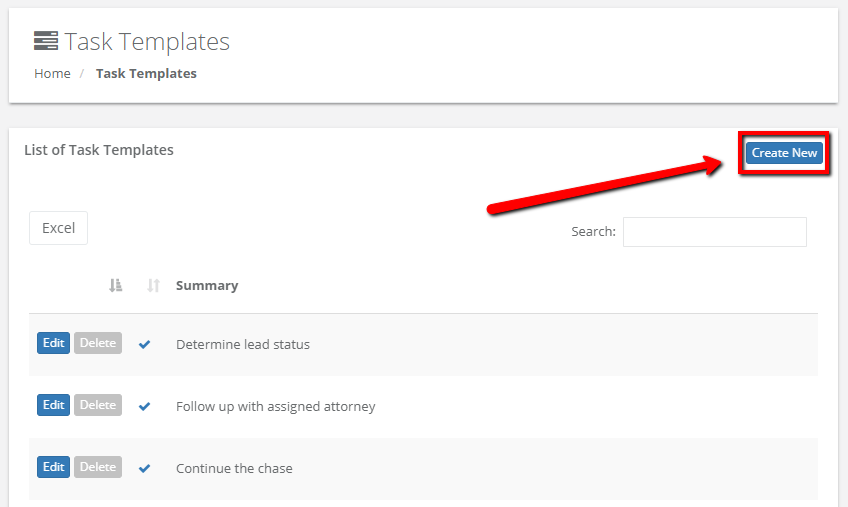
Step 2 - Click the Create New button at the top right
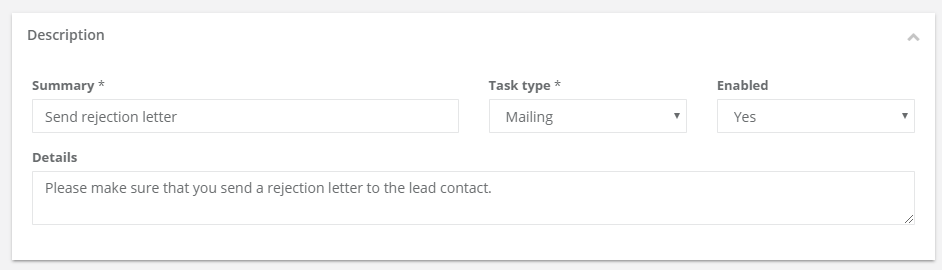
Step 3 - Fill out the Description of the Task Template (Example pictured below)
- Summary - A summary of the task. The summary appears as the description of a task when assigned to a user, and as the subject line for task reminder emails. Input fields can be added to the summary to automatically populate the text with a lead's information
- Task Type - The type of task (Action/Administrative, Contact/Follow Up, or Mailing)
- Enabled - Yes/No, if you want the template to be enabled and working in your system
- Details - The specific details about the task
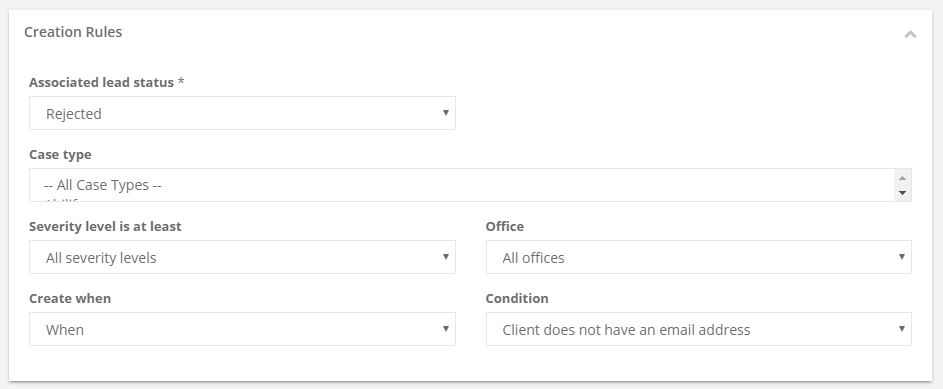
Step 4 - Fill out the Creation Rules for the Task Template. (Example pictured below)
- Associated Lead Status - The lead status you want this task to be associated with
- Case Type - The type of case (practice area) you want this task to be associated with (Default - All case types)
- Severity Level is at Least - The severity level you want this task to be associated with (Default - All Severity Levels)
- Office - The office you want the task to be related to (Default - All offices)
- Create When:
- Always - No specific condition needs to be met in order for this task to be assigned/completed
- When - A specific condition must be met in order for the task to be assigned/completed (Example - Mail a rejection letter when the "client does not have an email address")
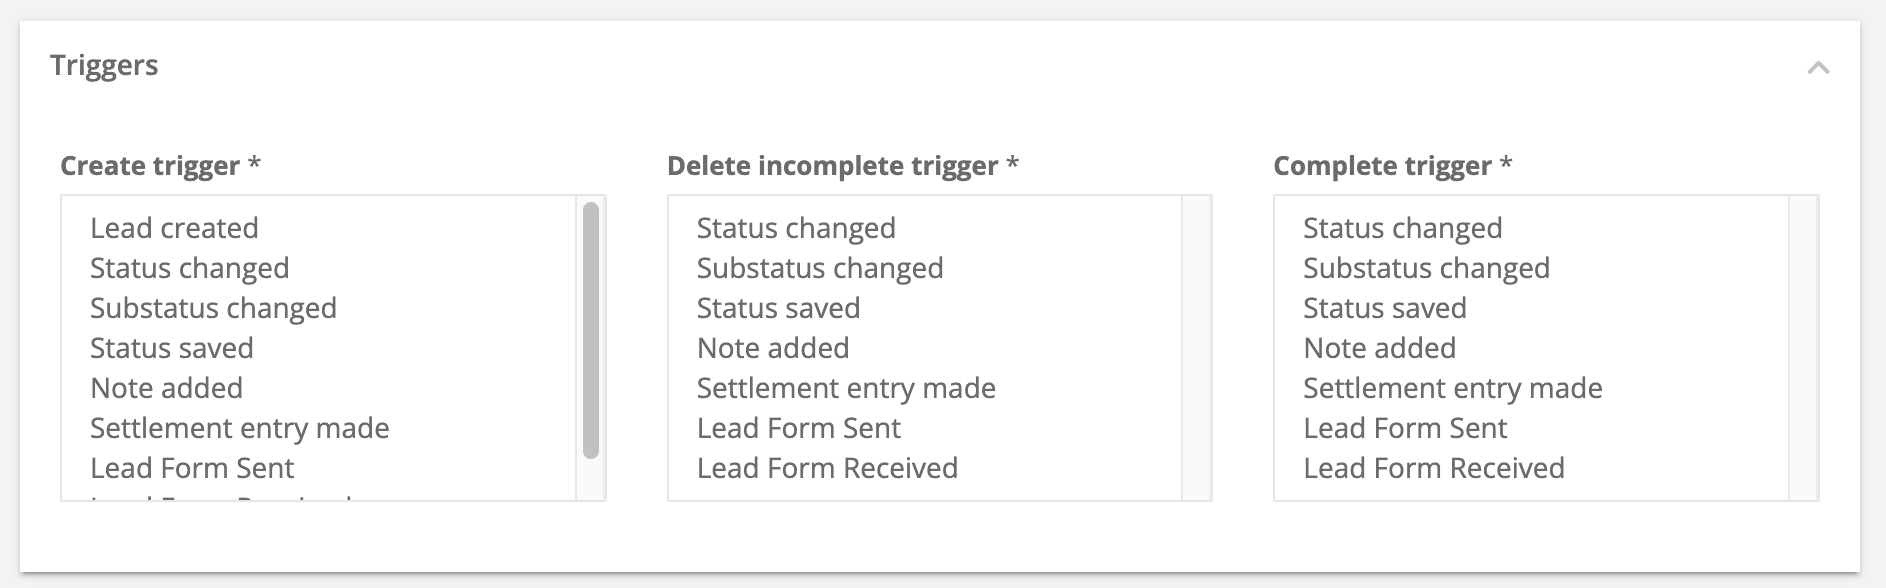
Step 5 - Triggers - Multiple triggers may be selected by holding down CTRL + Click. Sometimes there are multiple triggers, one trigger, or no triggers.
- Create Trigger - These triggers will cause a task to be assigned based on the following criteria:
- Lead Created - Task assigned when a lead is created
- Status Changed - Task assigned when the status of the lead changes
- Substatus Changed - Task assigned when the substatus of the lead changes
- Note Added - Task assigned when there are notes added to a lead
- Settlement Entry Made - Task assigned when someone enters a settlement for the lead
- Estimated Value Entry Made - Task assigned when the estimated value of the settlement is entered
- Lead Form Sent - Task assigned when a lead form is sent to the lead
- Lead Form Received - Task assigned when a lead form is submitted by the lead
- Delete Incomplete Trigger - These triggers cause the task to no longer be assigned after it is initially created by a Create Trigger IF the following occur:
- Status Changed - Incomplete task is deleted if the status of the lead changes
- Substatus Changed - Incomplete task is deleted if the substatus of the lead changes
- Status Saved - Incomplete task is deleted if the status of the lead is saved (most applicable when the status of the lead does not change but is still saved)
- Note Added - Incomplete task is deleted if there is a note added to the lead
- Settlement Entry Made - Incomplete task is deleted if there is a settlement amount entered for the lead
- Estimated Value Entry Made - Incomplete task is deleted if there is an estimated settlement value entered for the lead
- Lead Form Sent - Incomplete task is deleted if a lead form is sent to the lead
- Lead Form Received - Incomplete task is deleted if a lead form is submitted by the lead
- Complete Trigger - These triggers will automatically make the task complete IF:
- Status Changed - Task completed when the status of the lead changes
- Substatus Changed - Task completed when the substatus of the lead changes
- Status Saved - Task completed when the status of the lead is saved (most applicable when the status of the lead does not change but is still saved)
- Note Added - Task completed when a note is added to the lead
- Settlement Entry Made - Task completed when the settlement amount is entered for the lead
- Estimated Value Entry Made - Task completed when there is an estimated settlement value entered for the lead
- Lead Form Sent - Task completed when a lead form is sent to the lead
- Lead Form Received - Task completed when a lead form is submitted by the lead
Step 6 - Fill out the Assignment section
- Assign to - Assign the task to a specific role or a user
- Assign to Role/User - Depending on what you selected in Assign To, select the role or user this task should be assigned to
- When - When the task should be assigned (Now, or at a future time)
- When Condition Value - If a future time is selected, you must specify the the time here
- High Priority - List Before Other Tasks - Yes/No, if the task has a high priority and should be listed first, select "Yes"
- Play Notification Sound - A sound may notify someone to complete the task either once, until the task is complete, or never.
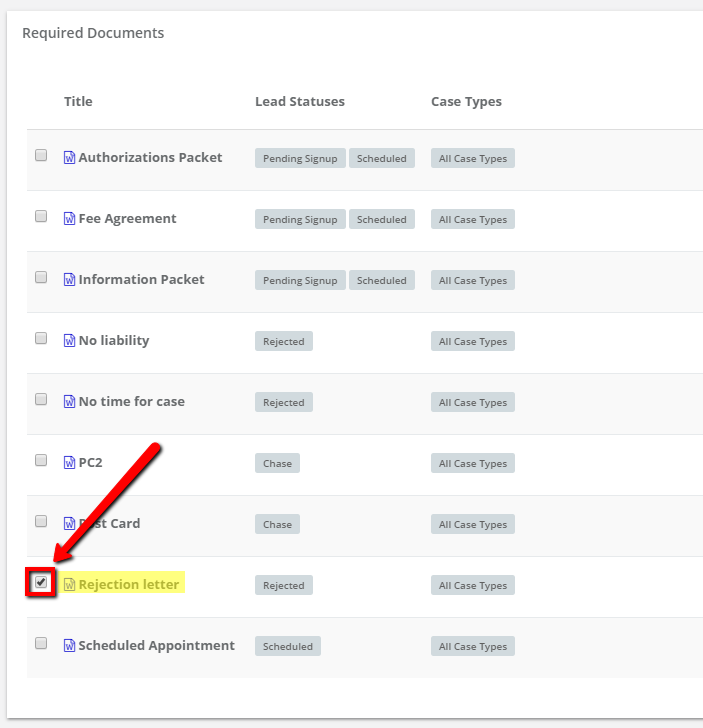
Step 7 - Select any Required Documents that may need to be associated with the task. In this example, you would select the "Rejection Letter" document since the task involves sending the Rejection letter.
(See Document Templates for how to create these documents)
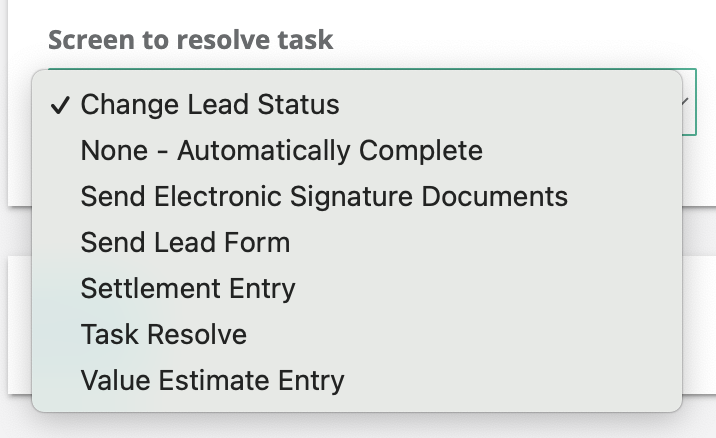
Step 8 - In the Other section, fill out the remaining criteria:
- Screen to Resolve Task - Select what action you want to mark this task as completed.
- Change Lead Status
- None – Automatically Complete (useful for tasks that you just want to send an email)
- Send Electronic Signature Documents – Useful for the Pending Signup / Electronic Signature status
- Send Lead Form - Allows you to send a lead form
- Settlement Entry – Allows you to enter an case value – useful on the Closed status
- Task Resolve – Allows you to chose Yes/No that you completed the step
- Value Estimate Entry – Allows you to enter an estimated value – useful on the Signed Up status
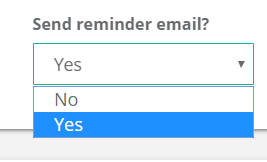
- Send Reminder Email? - Yes/No if you want to send a reminder email about completing the task.
- Send From - Where you want the reminder email to be sent from.

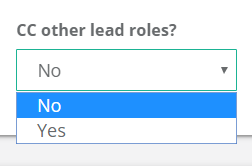
- CC other lead roles? - You can choose to CC any other roles associated with the lead.
Step 9 - Click Save
Comments
0 comments
Article is closed for comments.